My Little Gentleman – Suit Jacket Testing

In the last few weeks I have had a flurry of testing opportunities. I love having a chance to work with different designers and offer my proofreading and sewing skills. Testing for Amy of Peek a Boo patterns is always a pleasure and this occasion was no exception. Amy was revamping her Little Gentleman Suit Jacket and I was able to sew up a 2t during the test.
P2266572
I used a piece of suiting that I had purchased at a thrift store. Sadly, I didn’t have enough to make the matching vest but Amy has patterns for all 3 pieces so your little gentleman can be prepared for the most formal of occasions. Her directions and photos talk you through the complicated steps like attaching the lining to the outer layer at the cuffs and how to sew the vent in the back. I love how that touch makes it look just like an adult jacket.
P2266592

I am also kind of excited that this pattern gives me an excuse to buy a tailor’s ham. I need to find one somewhere because pressing those shoulders is impossible without one! Most of all, I am so happy that he loves it and he will be looking quite dapper for Easter this year!
P2266576

Tally Pleated Skirt and Shorts Testing

We are home from our wonderful Disney vacation but I fell into a bit of a sewing slump. After all there are hundreds and hundreds of vacation photos to look through. And the laundry… let’s not talk about the laundry that was piled to the ceiling! Fortunately, I was tempted back to my machine when I saw a quick turn around testing call from Chelsea of GYCT. I have tested for her before for the Tinley Tee and for the Rival raglan that I sadly never got blogged! It is always a great experience. She is always there for questions and her patterns are a lot of fun to sew.

This time, she was looking for testers for her new pleated skirt. My daughter had a blast looking through my fabrics and buttons. I have learned that letting her be part of the planning process leads to more pink but also to a skirt she is likely to enjoy wearing! We settled on a very thin corduroy I had purchased as a remnant and some shiny butterfly buttons that I bought at a thrift store. We trimmed with some additional pink polka dots.
I love how it ended up and more importantly, so does she!
P2136565.jpg
The flat front looks so nice.
P2136559.jpg
And the button tabs give a great place to add some contrast fabric or cute buttons. They could definitely be left off for a more streamlined look though.
P2136548.jpg
The Tally Pleated skirt is a fun pattern and I can imagine cute versions for every season! The pattern has clear directions to make pleats that look really professional. It also comes with a shorts version. The shorts are another great option keeping the cute style of the skirt but adding some modesty for all the active little girls out there. The pattern will be released on Monday February 16th and you can get yours here: Click here to visit GYCT Designs. Rumor has it this and all GYCT patterns will be on sale to celebrate the launch of the new GYCT website.

**Affiliate disclosure** Please note that the above link is an affiliate link and I receive a small compensation for purchases made through my link.

Grow Your Blog

Thanks to Vicki for hosting the Grow Your Blog blog hop again this year.

2 Bags Full

If you already know me and want a chance to find some more great blogs, click over to check out the big list of participants.
For those of you visiting for the first time, my name is Mary Ann and welcome to my little corner of the internet.
DSC_2264.jpg
This is me doing one of my favorite things. I love making things, especially with fabric and thread and I really enjoy sharing the things I make here on the blog. Sometimes I also talk a bit about the homesteading side of things. Besides my time spent raising my little people and sewing, I also keep chickens and bees and enjoy gardening, preserving food, and cooking.

In the last year, I have done lots of making and been able to find the time to share at least a little of it. I love to sew kid clothes and quilts and I love to make new things out of treasures dug out of the thrift store clearance bins. Also, this year I got a Silhouette Cameo machine so I have been having fun finding ways to use that toy as well!
You can see a few of the things I have been up to here below:
PB145721.jpg
Bottoms Up pants testing
PA265312.jpg
Zippy Keepers Pattern testing
PB045391
Plum Princess Purse and Gloves testing
DSC_5213.jpg
A Quilt for a friend

Right now, I am in a mad rush to sew lots of cute Disney clothes for the kiddos before our upcoming trip to WDW. Later on this year, I have plans to make a quilt for my nephew who is graduating from high school, sew up some spring clothes for my kids, and work up my nerve to start sewing for myself as well. I hope you stick around or come back later when I can share all of my Disney creations as well as show you the other things I make this spring! Just click the buttons on the sidebar to follow me with Bloglovin or feedly as well.
Thanks for stopping by.

Christmas pj’s

I had to squeeze in one more PJ post now that I have gotten to the Christmas pictures. How cute are these two little people in their matching pj’s.
DSC_5660.jpg
This makes me want to put them in matching clothes ALL THE TIME. Since Annabelle rarely agrees to clothes that aren’t pink and purple, I will have to settle for enjoying it when I can. For anyone interested in the sewing details. The flannel is from Joann’s and the red knit is from a t-shirt I sacrificed to the cause. For the patterns, Emmett is in another pair of Happy Feet pj’s and Annabelle is in a Sugar Plum night gown . Both of these are from Peek a boo patterns.

Bottoms Up Pants

Also in November I did some testing for Jess of If Only They Would Nap. This was her first pattern and testing for her was a joy! The Bottoms Up pants are designed to be a simple to sew pants pattern with extra room to cover the fluffy rear of a cloth diapered baby or toddler. The pattern fit great and the directions were awesome. I used a large pair of corduroy pants for the main fabric and a novelty robot fabric to make fun pockets.
Love how this picture!
PB145685.jpg
This picture shows just how happy pockets make kids!
PB145721.jpg
The pattern fit great and I couldn’t stop with one.

Here is my second pair. On this pair I serged wrong sides together then top stitched the seam allowance down on the side seams. The fabric is sweatshirt material fused with microfleece and I wanted it to be super soft inside. I love how it turned out. My husband keeps trying to figure how I can make a pair in his size. I should have bought more of that material when I found it at the warehouse sale!
10678721_755787224468669_5543976046997850516_n
Turns out I couldn’t stop there. Fortunately, Emmett needed pants.
10675612_756625901051468_8442580844447152352_n
Here he is wearing the brown cords on Thanksgiving.
DSC_5508.jpg

He might need a few more pairs of pants to match the shirts I am currently working on for our Disney trip. Guess what pattern I will be reaching for? Want the pattern? You can find it here.
Have you ever started with a new pattern and not been able to stop?

Catching up! The PJ post

Happy New Year! I am going to try and write a few posts to catch up on some of my sewing that I never shared back during the end of 2014.
Way back in November and December I did a bunch of PJ sewing. I got the Happy Feet sewing pattern from Peek a boo patterns which solved a big problem at our house. As the weather got cooler, we discovered that my 2 year old was not willing to wear 1 piece pjs. He also wouldn’t keep socks on at night and this was leading to me being woken often late at night by a chilly little boy.
Lots of sewing pj’s led to some very silly night time photo shoots.

Here is a pair made from some thrifted adult pjs.
PB125662.jpg
This pair is flannel with upcycled t shirt knit for arms and the tops of the feet.
PB125608.jpg
These were made with ABC knit fabric I bought forever ago at a thrift store and fleece cut from a snuggy of all things. I don’t recommend the reusing the fleece. It has not held up well to washing.
PB115593.jpg

Looks like those happy feet really made him happy!

These were made from a knit remnant and some thrifted pjs. This was while they still had feet. Turns out my daughter hates sleeping in footy pj’s so the feet were removed after a few wears. Since the knit won’t fray, it was a simple chop. She loves them now.
PB115507.jpg

I also made some Christmas pj’s. I hope I got pictures of them. Will have to look and see what I can find. Will be back soon with more to share! Thanks for reading.

Zippy Keepers pattern testing

In my latest series of pattern testing adventures, I got a chance to test a fun little pattern from Fenna of FABulous Home Sewn. The Zippy Keepers gives a step by step tutorial for making 2 sizes of zippered pouches with a whole bunch of decorative options. Fenna asked me to make the small version with the improvisational pleated center. I love the fabric ends on the zipper and the tiny size is great for reusing zippers I have pulled out of upcycled projects. The scale makes it perfect for using up small pieces of treasured (hoarded) fabrics.
Here is the one I whipped up.
PA265304.jpg
I love the teeny size. It is perfect for a change purse. For the photo I put some wonder clips in it because they were handy.
PA265312.jpg

There are also options for a pieced center and I can imagine it would be very cute with piping too! I think my kids might find some in cartoon fabric in their stockings on Christmas morning. The pattern is out today on Craftsy here. Pick one up and get started on that Christmas list today.

Plum Princess Purse and Gloves testing

Last week I had the pleasure of testing the Plum Princess Purse and Gloves pattern for Angela of ZuzzyPatterns.  This was one of those quick sews that makes you feel so proud when you are done.  I was skeptical starting, thinking there was no way my gloves would turn out but I followed her simple directions and ended up with this!

PB045448

I couldn’t believe it either! I can’t take complete credit.  My fabulous model also picked great fabric for the gloves. It is from a thrift store shirt, I first used to line a super hero cape last Christmas.  I don’t have many scraps left now but I am saving them because this stretchy red with stars is fabulous.  I still have the wonderful star buttons looking for a good home.  The fabric lead us outside for  a super hero photo shoot.   At first when I told her to be a super hero she said, “What?”

PB045391

After some coaching she got into it.  Here she is using her super hero powers:

to climb the walls

PB045397

to fly

PB045417

and to battle the bad guys.

PB045420

I have to admit, being able to sew these up made me feel like a sewing super hero.  Angela wrote a very clear and beginner friendly pattern.  It really does sew up quickly.  I have already made a second pair in a fuzzy knit that sort of makes me think of cookie monster.

1390620_749045945142797_4289771935009028537_n

You can find this pattern here on Etsy and for only 6 dollars you get the pattern for the gloves and a sweet little dress up purse.  This would be great for sewing up a quick Christmas gift for all of the little super heros (or princesses) on your list.  I can tell you that the purse is also a quick and fun sew but I can’t show my pictures of it quite yet!

What have you done lately with your super powers?

PS. I linked up with Sew + Show at StraightGrain!

A Quilt for a Friend

Have you ever had someone ask you to make something that made you feel honored, creatively challenged, and a little bit terrified all at the same time? That is pretty much where I was at when my part of this story began. Four years ago, a dear childhood friend’s life changed when her sweet baby boy made his arrival much earlier than anticipated. His road has been a bumpy one but he is a thriving healthy 4 year old boy today. Everyone who knows Ian is so grateful to see him healthy and strong. She shares details of his medical journey here:

The Adventures of Beaner

Katie is a fierce advocate for her son and the most organized person I have ever known. The information she has compiled here is a helpful resource for other families going through similar challenges.

When she asked me to take his premie clothes and make a quilt, I had quite a mix of emotions. I was grateful that Katie could give me a lot of direction to start. She liked the rag style quilts she had seen, knew she wanted blue or brown for any added fabrics, and told me to not avoid the stains on the clothes. Those stains are just part of the story. I also felt blessed that she encouraged me to be creative and surprise her with the results. Her confidence in me got me past the terrifying idea that I was cutting up their precious memories, and made me realize that this was a fantastic chance to make something beautiful, comforting, and lasting. If you just want to see what I ended up with, scroll on down to the bottom. I don’t mind! This is going to be a long post. But I do want to record how I got there, just for me and because I couldn’t find much information specifically about premie quilts and I know there are other people out there trying to figure this out.

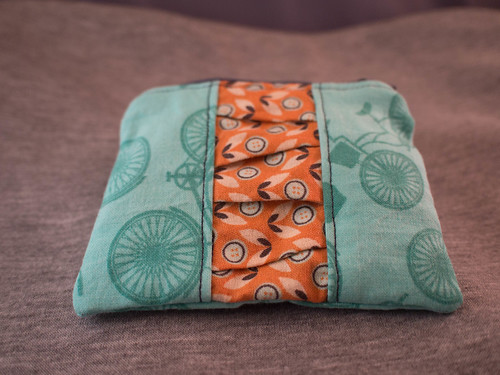
Getting started I researched rag quilts. The tutorial at The Cottage Mama was a great place to start. I also got inspriration from this tutorial at Mominizer. The idea she shares for using small squares to make the larger squares was instrumental in the success of my design. I tested it with some fabric scraps and my baby boy ended up with a quilt to snuggle his stuffed animals in. IMG_20140808_173721
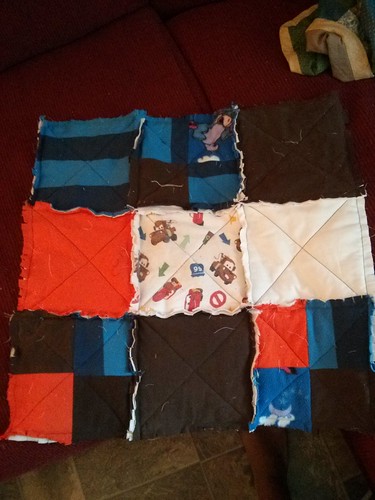
After measuring some of the clothes she sent, I decided to go with a 6 inch finished square. Here you can see evidence of my figuring:
P8114813.jpg
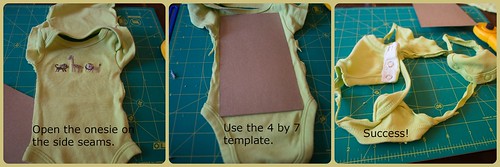
This meant cutting 7 inch squares out of clothes and I can tell you that many premie clothes are too small for that. So I also cut 4 inch squares and 4 by 7 rectangles.
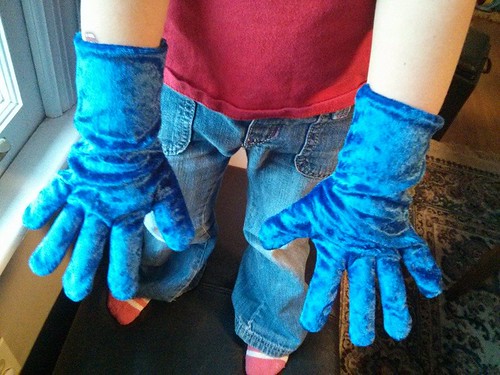
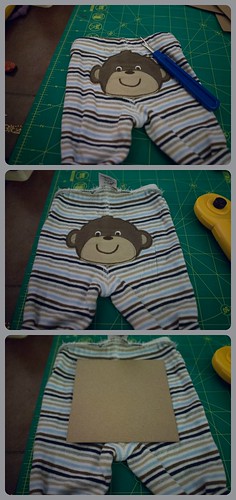
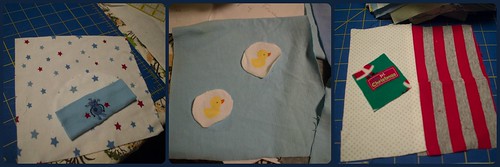
Here you can see a typical pair of pants with the 4 inch template. It wasn’t going to fit. By deconstructing the pants, I was able to pull a 4 inch square from each leg.
striped pants 1striped pants 2
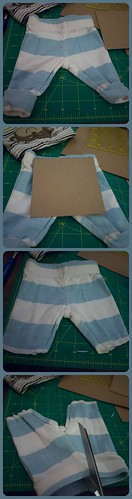
For pants with a cute little detail on the butt, I opened the waist band to squeak out the 4 inches.
monkey pants
Those teeny tiny onesies came apart a little more easily and it felt like a win that the scrap left over was so small.
premie onesie
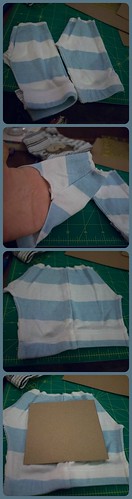
Long sleeves could be opened and a 4 inch square squeezed out. I ended up with lots of the little mitten sleeves included in the final quilt.
P8134840.jpg
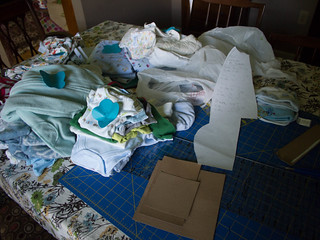
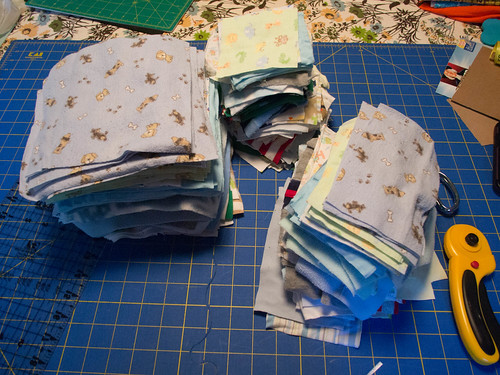
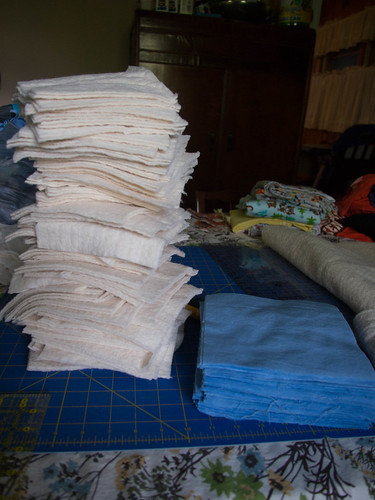
Thankfully there were plenty of clothes and I had asked Katie to send some extra blankets and bedding. I figured filling in with other special fabrics would be better than impersonal quilt shop fabric. It is amazing how many squares you can cut out of one of those swaddle sacks with the wings that velcro around the baby. When I was done petting all of those itty bitty clothes and it was all cut, I had this:
P8254898.jpg
Next I had to make sure that any snaps and zippers would not be pulled open by a curious preschooler. I have my own 4 year old and I know how they think. All of the snaps and zippers were securely sewn closed.
P8264903.jpg
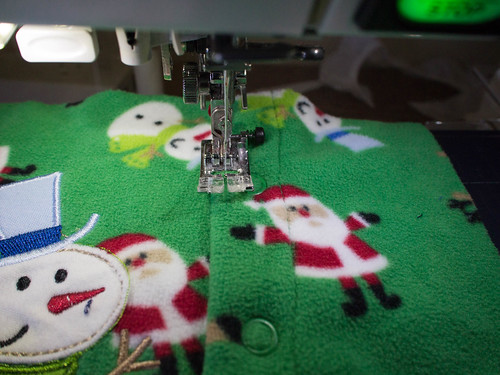
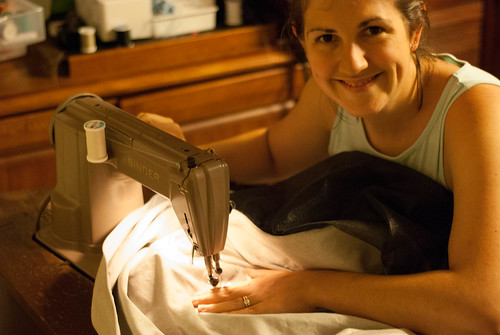
And I sat down at my machine with this view.
P8284906.jpg
I sewed the 4 inch squares in pairs and then each pair was sewn to a 4 by 7 rectangle. I had a few more rectangles and those were paired together. I tried to do this as randomly as I could while not putting two from the same garment together.
Next I tackled my pile of little details that were too cute to leave off but to small or to close to the edge of something to cut into a rectangle.
P9024920.jpg
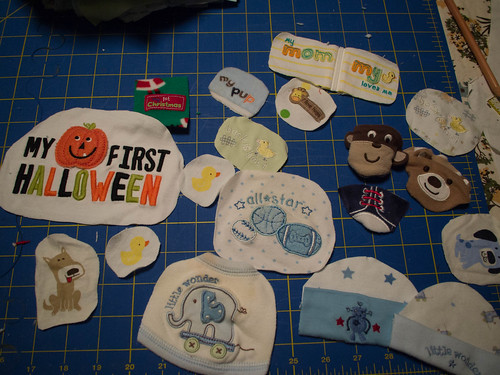
These were raw edge appliqued on to some of the simple 7 inch blocks.
details
I cut 7 inch squares of Cotton Candy blue Kona for the backing and 6 inch squares of batting.
P9064933.jpg
After this, it was like any rag quilt. I made the small quilt sandwiches and quilted each with an X. I did notice that sometimes my machine would pull the leading corner into the throat plate. It helped to chain feed them one after another and when I was starting fresh, I would sew on a small piece of woven fabric and then chain on the square. The 7 inch squares were pieced together randomly into larger sections. It was strange to be sewing wrong sides together but I concentrated and didn’t have to use a seam ripper once (on that part at least!). The sections looked like this.
P9144969.jpg
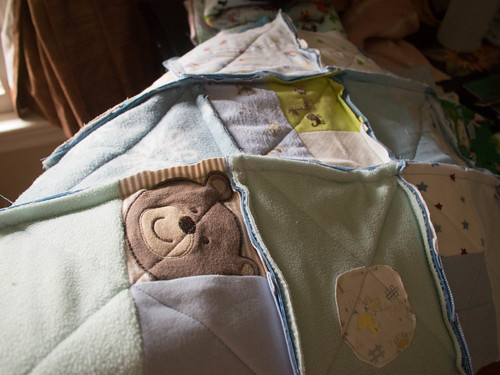
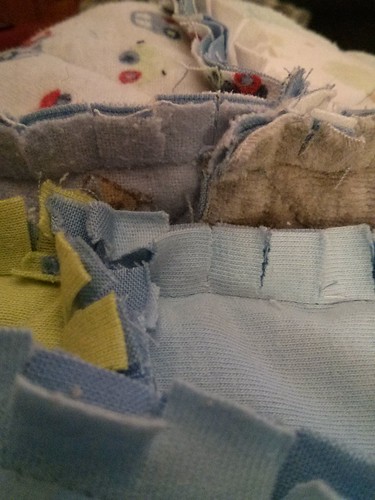
After this I did lay out each section to make sure fabrics were distributed well and there were no odd groupings to draw the eye. However when the whole thing was pieced, the real work was just beginning. Do not underestimate the time and effort clipping the edges will take. I had to take several days off between clipping sessions or my hands would ache. Finally, the clipping was done.
IMG_20140925_220005
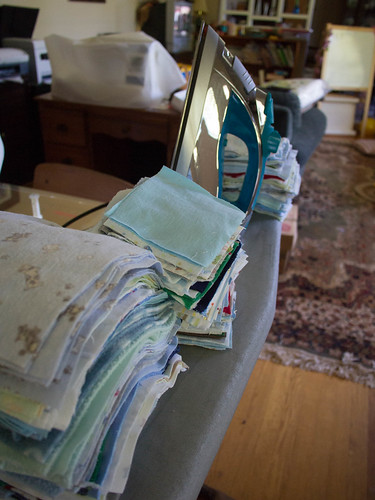
Then I washed it and dried it to get the fabrics started fraying. There was a lot of lint! This was my lint trap half way through the cycle:
P9264970.jpg
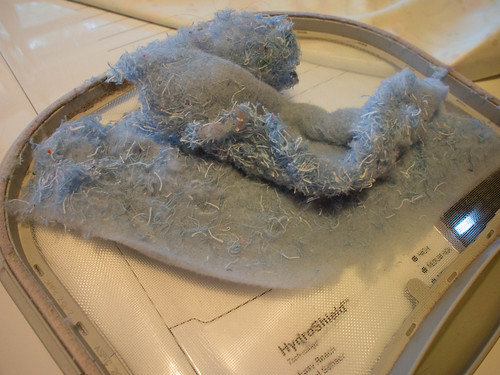
My machine also needed a good cleaning to get all that lint out!
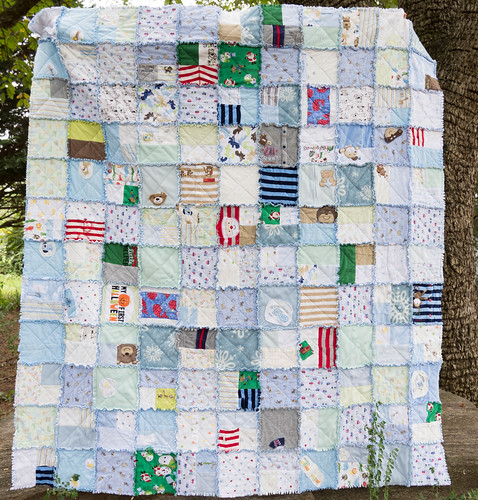
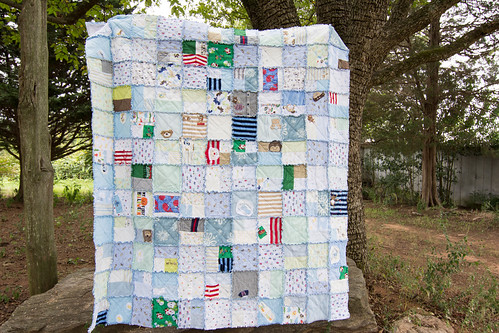
Finally, this baby was done. Here is my finished picture.
DSC_5216.jpg
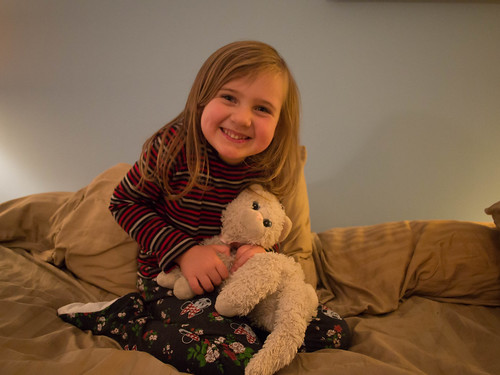
But the best pictures came from Katie when Ian opened the package. His smile lights up a room! So glad I could play a small part in this big story.
Thanks for reading along on this long long post and if you are ever tackling a project like this and want to talk it over, please email me. I would love to help you figure it out.

Testing for the Tinley Tee

Last week I had the pleasure of testing the Girl’s Tinley Tee pattern for Chelsea from GYCT designs. It was a wonderful experience. The directions were great and I really enjoyed being part of the testing group. Today the pattern is available.
P5043751
This is a slim fitting girlie tee pattern with tons of options. I sewed a size 4 with gathered cap sleeves and banded hem.
details collage
You can find out more about this pattern and all the options here.
Annabelle loves it. It’s great for running, playing and mastering the hula hoop!
action

After my first one, I had to try a second from a thrifted shirt. Using the existing hem made it sew up even more quickly and I used the existing sleeve bands to make the elastic casing for the sleeves.
tinley tee 2

(Love my little photobomber peeking out in his pj’s.)
You can get the Girl’s Tinley Tee pattern here: Click here to visit GYCT Designs.

**Affiliate disclosure** The link provided above is an affiliate link. I will receive a small compensation for purchases made through my link.